Insert the soundpost through the torque tube flat end first. Before you push the post all the way back to touch the tailblock, use the post as a handle and swivel the Bridge System so that the post is parellel to the centerline of the back. (Remember that there is no bridge pin hole in the exact center of the bridge and the post will therefore lie off to the side of the centerline and the soundpost will contact the tailblock off to one side of the endpin hole.)
|
Once the unit is aligned, push the soundpost all the way through until it touches the tailblock.
|

Put a pencil mark on the soundpost where it protrudes from the torque tube and then measure the distance (Distance A) from the mark from the tip of the post.
Remove the sound post and mark the post at the other end the same distance from the end as Distance A. Add 3/8 inch to this measurement and cut the sound post at this point (Distance B).
|

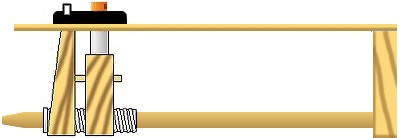
Put the soundpost back into the JLD Bridge System flat end first and twist the adjustment screw into the torque tube behind it. The adjustment screw (well... it's not really a screw, but it sounds strange to call it an adjustment plug) has an alan key head in it which should face outward.
|