INSTALLING THE
JLD BRIDGE SYSTEM
PART 1: DRILLING THE MOUNTING HOLE
The JLD Bridge System is very easy to install.
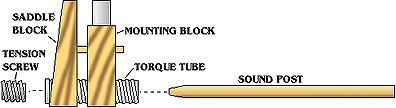
For reference, parts are referred to by name per the above diagram.
The first step is to drill the hole through which the mounting screw will be inserted.
|
To install the JLD Bridge System with a mounting screw, you will need to drill a small hole through the bridge.
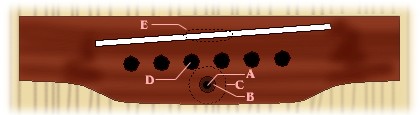
Mark a point (A) just behind the middle two bridge pin holes. Allow distance between point A and the bridge pin holes so the mounting block (C) will not obstruct the Bridge Pins after you mount the Bridge System. (If you screw up, don't worry. You can always drill out the top of the mounting block to accommodate the pins.)
Using a 7/64" drill bit, drill through the bridge and through the top into the guitar at point A.
|
Next, we'll countersink the hole so we can hide the head of the mounting screw.
|